Showing posts with label For / with kids. Show all posts

25 Nov 2011

Extraordinary picture frame

Helo there, I'm still here! Here is one more easy craft for kids. Probably from now on I'll be posting more adult crafts as my situation has changed and at the moment I don't work with kids. But still some ideas left, so here we go! 


Here is my Tekila's photo framed in extraordinary frame we made with kids during last summer. All you need is : some colored tissue paper, carton (old box is perfect), glue and a stick or a straw.

Cut the shape of the frame - its just a rectangle (it might also be a square - as you wish ) with  cutted rectangle in the middle. (This one might be dificult to do for the kids the slves. Strong adult hand requiered).


Bit by bit put some glue on a carton and start sticking bits of colored tissue paper (you cut paper to small pieces, not neciserely very even). The trick is that for sticking we use a staw: put straw in the middle of the paper, wrap it a bit and stick. Only the center of the piece of tissue paper is glued, all sides are sort of sticking out. Which is good. Try to put paper as close to each other as posible, so carton could be seen. 


Good luck!!!!

5 Sept 2011

Crazy peg faces

As they say in Cyprus: "Long time no see" :)  But it doesn't mean we were on holiday. Many new ideas for crafts just waiting to be written. Let me start from very simple craft for kids we made today.


I got some old pegs to throw away what I, of course, didn't do. Instead we came up with this craft idea to stick some crazy faces made from color card.


Simple and really fun. All you need is some color paper and glue and - as always - imagination! We made a whole family. You can use these fun pegs to separate your glass in a crowded birthday party or to put it on a flowerpot so your cactus wouldn't feel lonely :)


5 Jun 2011

This and that

It's been a while since I posted something. Still problems with internet. Oh, well. It's Cyprus! But it doesn't mean I stop playing with paper and stuff. In fact have some new materials to play with, and some new ideas too. But before I want to share something I've been working lately. Just some pictures from this and that. 

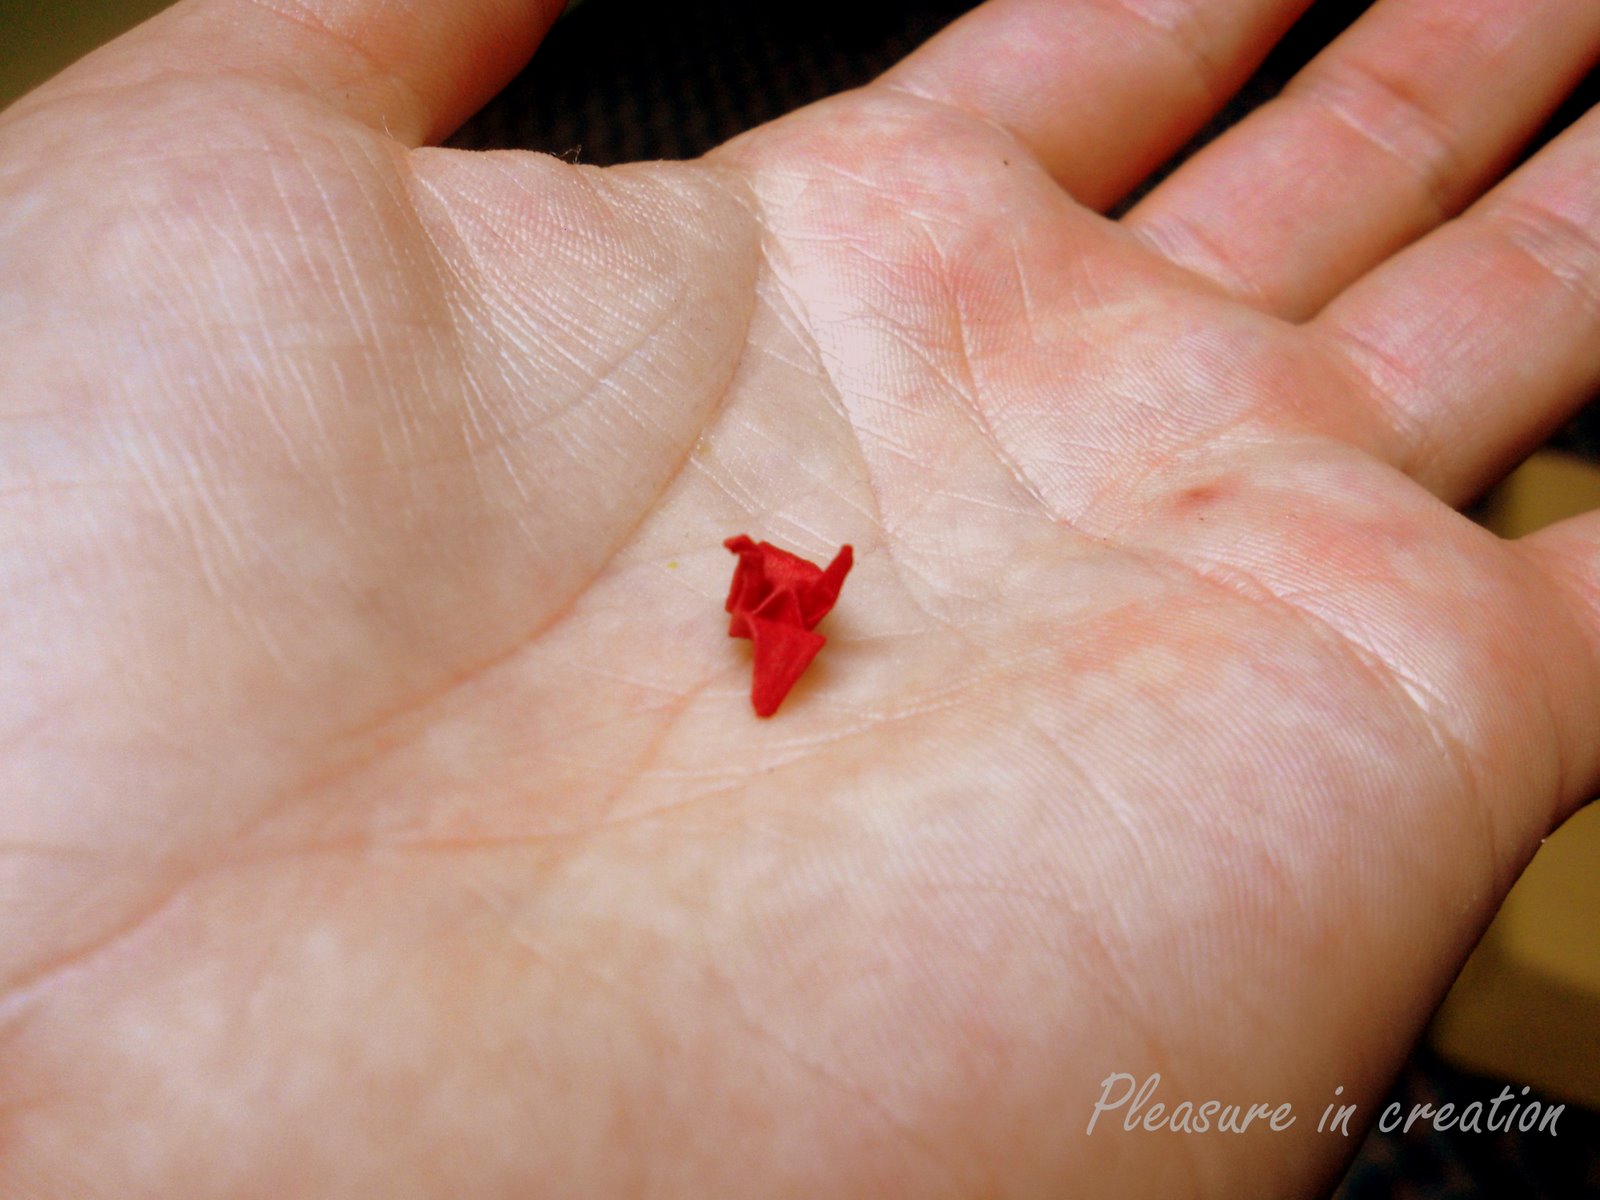
The smallest traditional Japanese crane. More about it in here.

Kanzashi flower brooch. I wrote a little bit about material flowers in here. I'm stuck a little bit with making these, but I already found some good tricks how to make things easier. Like for example I actually used gelatin to make fabric more like paper, so it makes measuring,cutting and folding processes much easier. More difficult to sew thought. Anyway, I promise a full and detailed post after I finally finish experimenting. 


One more bird - sort of peacock - for 3D origami family. I saw the instruction somewhere and I'm sure it's easy to find a few versions of it on internet but to tell you the truth I was absolutely improvising. 

Oh and this thing now is on the wall in my new temporary  bedroom. Just tried to make it look more cosy. Oh well, I borrowed the words from proverb "Learn from yesterday, live for today, hope for tomorrow" and added "feel" to it. And also butterflies. I finally managed to sit down with an amazing Michael G. La'Fosse's origami butterfly book and actually learn how to make few sorts of there creatures.

I thought it might be fun to make a dream catcher with kids. Using all these bright colour feathers and breads I have. And in between experiments I'm still making kusudamas. Here are a few:


9 May 2011

Friendship bracelets

Long time! After all sorts of things I'm back again with new arts and crafts. At the moment I've just changed my working place - moved to next door hotel. I'm going to work in kiddies club only, so hopefully I'll have loads of time to create new crafts and original activities In fact, I already had a chance to remember old days how I use to make double knot bracelets at school.


Making them is really easy and my first try to teach 8 year old Liza was a success! Next day she came to make one more for her friend, and another...


I didn't make step by step post this time. But there are loads of instructions on internet if you google it, here is one, which I find really clear.
Of course, beside double knot bracelets there are loads and loads of ways to make friendship bracelets by just using a simple string. I've tried a few, but the list is endless! It's really good activity where you don't need loads of things and of course it's a great gift for friends of a nice memory from holiday. Have fun!


24 Mar 2011

Modular bunny

Finally modular bunny is finished. Its' made only from recycled paper, when you will make yours, you can try use more bright colours. The instruction in Russian but with very clear pictures you can find here or you can just improvise as I did.
And sorry for the picture. It's not the best quality because is made with my phone, but my camera is arriving really soon , so I promise soon much more crafts with much better pictures!


9 Mar 2011

Carnival masks

It's been really busy last few weeks in here! A festivity - Limassol carnival - brought to this town a lot of families from all Cyprus. What kind of carnival without masks?! So of course we making different masks every day all week long.


The easiest way to make a mask - printable masks which you can find on internet, like here. To make activity last longer and to get various and original masks - you can print black & white masks and let kids to color them. 

What we did, we made some masks my favourite mosaic technique. Thanks to David and all his family for thinking about us and bringing pile of masks for us! Those are simple ready made carton masks with  sores. (Good example of advertising, by the way. Well done Primetel!)


Unfortunately all advert was covered with different color paper. Thanks to Carole & Rob for sending us some shiny, glossy paper. It made our masks even more luxurious! And we didn't have use glitter on which I'm not so keen as it is impossible to take it from my head and clothes after :)))


In the end I came up with idea to decorate masks with a paper feathers. I found some impressive paper feathers in here.

So here it is! Really easy to create right atmosphere for the carnival. In the evening on a mini disco everybody was wearing their own made masks !

5 Mar 2011

Simple stamps

I saw this idea in internet and decided to try it in kiddies club. As some boys don't have enough patience for making more difficult crafts, but still they were anxious to make some postcards for their relatives at home. We tried to make it as simple as possible and it worked just perfect!
I made a few simple stamps by rolling a piece of carton box in a different size rolls. Just a bit of paint and postcards are ready! Just need to write down all the wishes on the other side of the postcard after the paint dries :) 


4 Mar 2011

Recycling

Recycling with no doubts is a good thing and we all should contribute to environment protection. That's why I always try to use one paper twice and if it's possible even three times :) And I always try to use something what is at a hand for our arts & crafts. This time we were making some mobiles from plastic bottles.


I just cut the bottle in different sizes rain drops and hanged them in a circle. My friend Fredi as always tried to make this craft look as a real piece of art. 
I really like the colour of these plastic bottles, so I was trying to make a nice blue cell for traditional Japanese crane. One kid asked me if we going to learn this bird to speak or sing! :)


Using plastic bottles can be great fun, especially if you have different colours. But its better prepare the shapes for kids if you planing to make mobile as it takes some time and it's not really easy to cut plastic. With kids we were using pieces of colour straws to make our "rain mobiles" more colourful as there was a rainbow after nice summer rain. Experimenting is fun!

21 Feb 2011

Quilled aquarium

Lately it was quite busy in a kiddies club. We spend much more time playing games than  making crafts. But in a breaks between running and shouting we managed to make some nice postcards for parents and friends and to quill some colour paper.
I'm really proud to present brand new quilled aquarium by Amphees, Karina & Max with Sky's supervision :) 


17 Feb 2011

Tissue flowers. Step by step.


We still using anything and everything what we can find in a hotel for our arts and crafts. So a few days with two really diligent girls we made this big bouquet of tissue flowers. Vase is mosaic from small pieces of colour carton. For making flowers we used simple white tissues and some green  crepe paper for leafs.
Its really simple to make there flowers and variety of flowers you can make by using the same tissue is incredible!


All you need to do is:  
  • Fold the tissue and staple in few places. Then draw a shape of flower leaving staple in the centre of the flower. Cut the flower shape. 


  • Lift every layer of tissue one by one and press a bit to centre.     


  • After you finish lifting up the layers turn the flower up side down  and put just a bit of paint. Mix the paint with some water as tissue absorbs the water together with paint and you have slight colour in the middle of the bloom. Also if you want it more colourful you can do the same from the other side. Just be careful not to rumple it.


Use your imagination! You can make loads of different blooms by using simple tissue. It depend on you how big your flowers will be, me personally prefer micro :) Here is slightly pink sakura twig picture I made:


1 Feb 2011

Building the dream city

My little friend Masha is back. So we're having much fun by making new things in a kiddies club.
Lately we stared building our dream city. Its still in a process because we keep building it, Masha at the moment is building a brand new library!


The idea of paper city I found in amazing Made by Joel blog. There you can even find a print out to make life more easy. Or you can draw city yourself like we did with all the things in it like houses, banks, restaurants, bars, kinder garden, library... also you definitely need buses or cars to get there...
Have fun! :)


16 Jan 2011

Party hat dolls


Making kusudama dolls became really popular activity in our kiddies club. Even moms are interested to make one or two and to learn how to make a flower. One day there were so many doll makers that I ran out of ready made flowers (normally I have a box full of different sizes colored flowers and kids just put them together into a doll). I decided to use a party hat as it has the same shape as a flower and to show hot it goes.
Even if you don’t have ready party hat, it’s really easy to make them from carton as long as you have at least one party hat as a template. For hands you can use small kusudama flowers or just cut them from the same carton. Heads are made from cotton as it was before – just couldn’t think of anything better from the things we have at home. Just one more thing – now I put the tooth stick instead of a neck. Of course you can't see it but it helps to keep your dolls head straight even if you make a nice but usually quite heavy for cotton head hat. 


One more trick – round paper napkins. Absolutely love them, and for sure this is not the only craft were I’m going to use them. I made a princess doll. Thanks god there are girls who still like princesses because sometimes it seams to me models, movie and pop start taking over! I used the same napkin to make princesses’ dress, sleeves and a crown.
Our doll family is getting bigger. Masha already made 5 grandchildren and named to all of them. There is a risk our family will need a separate window – sill.


15 Jan 2011

Sonobe decision maker


Yesterday we got the great idea how to make not only nice but also useful thing from sonobe module cube - we made a decision maker. Sometimes kids are so excited to try all arts and crafts they see in a kiddies club it can be really hard to choose where to start. In this situation our decision maker can be a great help.

While I was being lazy and writing activities on each side of cube my friend Masha did a great job by drawing pictures of all stuff we can do in a kiddies club on a windy day.


Quilled zoo


Last two days we with my 5 year old friend Masha were really busy. It was too windy and rather cold to play outside so we decided to make a few new projects. After finishing mosaic we decided to try paper quilling. We were doing pretty good I think. Masha was making different sizes paper rolls and I was putting them together, trying to make all kind of animals we could think of. Finally we got the whole zoo!
We didn’t have any special tools. For quilling Masha used handle of a paint brush. We used different color paper – some of animals are made from colored carton, some from ordinary color paper. It’s a bit more difficult to glue the carton rolls – then it’s better to use ordinary glue than a glue stick. Heads of our animals we cut from paper and we used ready made eyes but you easily can draw them. As we are not professionals we didn’t really used any scheme to make bodies from rolls, we just improvised and here is the result: 


12 Jan 2011

Paper wind chime

We were making paper wind chimes with kids last week. Well it's not actually a chime and they don't give any sound, but its still great fun to make them as you can use a lot of techniques. And also you can use it as a decoration in your room by just hanging it on a lamp for example.

You have to make 5 shapes. We use colour carton for that. You can make anything you like and you can decorate your shapes with quilled paper, you can make a small mosaic on each shape or just draw something. Also you can make a wind chimes from traditional Japanese cranes or fishes any other origami. It's fun! We use simple straws and string to make a cross and to attach the shapes.


Mosaic

Mosaic - one more great craft from paper. We save all the small pieces of colour paper, after we cut them into small shapes and then stick them on any drawing you like. Smaller pieces of paper make the picture look even more elegant but also it takes more time to stick them and some patience of course!